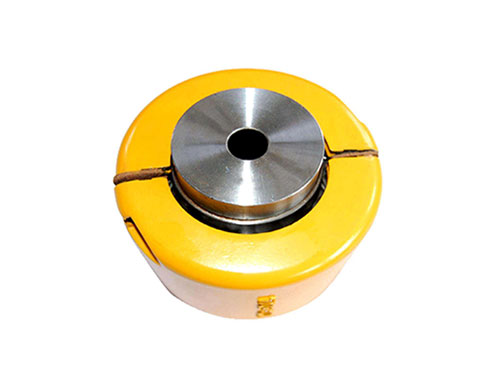
 KC type sprocket couplingKC series sprocket coupling is used to connect...
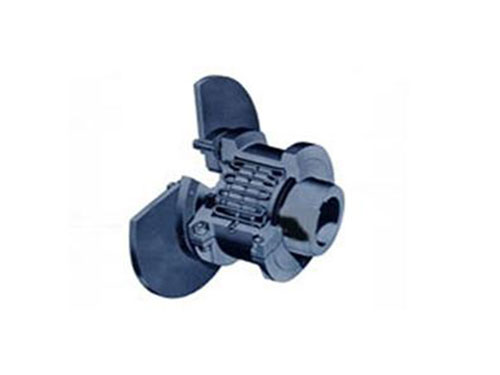 JSP type coupling with brake discJSP type couplings with brake discs generally should...
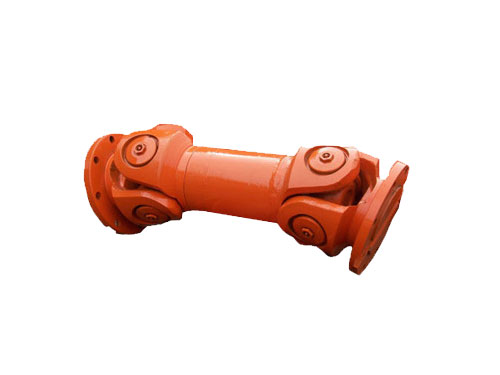 Universal couplingThe universal coupling uses the characteristics of its mechanism...
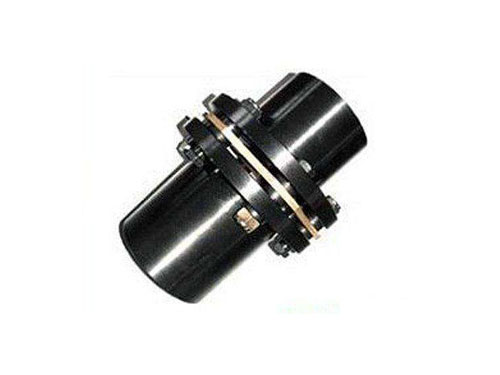 JMⅡ type non-counterbore basic diaphragm couplingJMⅡ type non-counterbore basic diaphragm coupling...
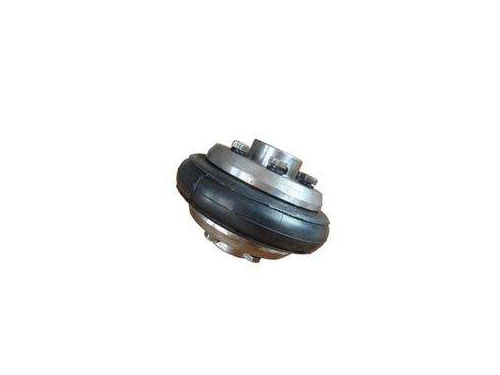 Tire coupling for LLA metallurgical equipmentThe tire coupling for LLA metallurgical equipment is...
The use of diaphragm coupling and screw installation method
During the service life of the diaphragm coupling, it is necessary to maintain the wedge-shaped clearance surfaces that are inclined to each other, add lubricating oil, and exit from the large port into the small port.The two surfaces have sufficient relative movement speed, the fluid has sufficient viscosity, and sufficient oil is required.In the maintenance process, it is important to grasp the basic scope of hydrodynamic lubrication, which is also the theoretical basis of sliding bearing design.
The diaphragm coupling can actively compensate the axial, radial and angular offset caused by the motor, as well as the influence caused by factors such as manufacturing error, installation error, bearing deformation and temperature rise.Diaphragm coupling is a metal elastic element in flexible coupling. The advantages of driven torque transmission, elastic vibration, no noise, and no lubrication are the ideal products to replace gear couplings and general couplings.
The diaphragm coupling bolt connection does not need to be threaded on the connecting piece, the use is not restricted by the connecting piece, the structure is simple, and the disassembly and assembly are convenient.Stud bolts can be used in occasions where bolts cannot be used due to structural restrictions, but a compact connection structure is required.The bolt connection does not have a nut and has a smooth exposed surface, but it is not suitable for frequent disassembly and connection to avoid damage to the threaded hole.
The diaphragm coupling consists of several groups of diaphragms (stainless steel thin plates) that are alternately connected to the two halves of the coupling with bolts. Each group of diaphragms is made up of several pieces. The diaphragms are divided into connecting rods and different shapes. Sliced.The diaphragm coupling relies on the elastic deformation of the diaphragm to compensate for the relative displacement of the two shafts connected. It is a flexible coupling with strong metal components with good performance. It does not require lubrication, has a compact structure, has a good service life, and does not rotate. The clearance is not affected by temperature and oil pollution, and is suitable for shafting transmission in high temperature, and corrosive medium working conditions.
It is widely used in shaft transmission of various mechanical devices, such as water pumps (high-power, chemical pumps), fans, compressors, hydraulic machinery, petroleum machinery, printing machinery, textile machinery, chemical machinery, mining machinery, metallurgical machinery, aviation (Helicopters), naval power transmission systems, steam turbines, piston-type power mechanical transmission systems, crawler vehicles, as well as generator sets, high-power mechanical transmission systems, after being dynamically balanced, have been relatively common in transmission shaft systems.
The gap between the bolt fitting section of the double diaphragm coupling and the flange hole fitting section is generally based on the bolt diameter of 0.20mm~0.30mm. This fitting section plays a key role in transmitting torque. If the gap exceeds the standard, it needs to be replaced.The diameter gap between the inner hole of the buffer sleeve and the diaphragm rivet and the bolt is 0.5mm~0.7mm, which plays the role of pressing and positioning the diaphragm.If the bolt is installed in the direction of the bolt, it is easy to cause the bolt to deviate, and the diaphragm will be twisted and deformed.Therefore, pay attention to the direction of the bolt when installing the bolt. Do not install the bolt direction at will, otherwise it will cause the diaphragm to twist, and long-term operation will damage the surface of the diaphragm and the bolt mating section, and the small hole of the semi-shaft joint.
1. When disassembling, mark the position between the pulley or coupling and the rotating shaft first, screw the factory fixing screws and pins, and then slowly pull it out with a puller.If you can't pull it out, you can pour some kerosene into the inner hole and pull it out.If you still can’t pull it out, you can heat it around the pulley or coupling with rapid fire. At the same time, wrap the shaft with a damp cloth and continuously pour cold water to prevent heat from being introduced into the motor.
2. When assembling.First use a fine iron emery cloth to smooth the shaft hole of the shaft, pulley or coupling, align the pulley or coupling with the keyway and put it on the shaft, use wrought iron or hardwood block to pad one end of the key, and gently tap the key Into the slot.The key should be tight in the groove moderately. Too tight or too loose will damage the key and groove, and too loose will make the belt slip or vibrate.
After selecting the right coupling, it should be installed, and the position of the coupling should be adjusted correctly during installation to achieve a good alignment state, which can extend the life of the coupling as much as possible.
The specific steps to adjust the coupling correctly:
(1) Fix the outer foot on one side of the coupling motor and move the inner foot until the eccentric line between the motor and the pump center is zero.In order to prevent the motor from moving freely, after fixing the feet on one side of the motor, the other side should be supported by the top wire.
(2) Fix the inner feet of the coupling and move the outer feet so that the eccentricity of the two center lines is zero.
(3) After the above two methods are repeated several times, the coupling can be in a good alignment state.
How to install the diaphragm coupling screw:
1. Tighten the tightening torque according to the specified tightening torque.
2. Tighten the fixing screws in turn in the circumferential direction.
3. When disassembling, please proceed with the device fully stopped; loosen the locking screws one by one.
4. Clean the inner hole of the diaphragm coupling and wipe it with oil or lubricant.
5. Wipe clean the dust and dirt on the surface of the installation shaft, and apply a thin layer of engine oil or lubricant to the machine.
6. Insert the diaphragm coupling into the mounting shaft; if the aperture is too tight, please avoid hitting the installation with a hammer or hard metal.
7. After the positioning is completed, first use a torque wrench (the specified tightening torque 1/4) to tighten the screws slightly in the diagonal direction.
8. Increase the strength (1/2 of the specified tightening torque) and repeat the action.
Next:Nothing